
Sass is a CSS pre-processor. When you write in the Sass language, you use a compiler to convert your Sass files – usually written in the .scss file format – into CSS. Sass adds handy functions, variables and other script-like helpers that make CSS quicker to write and easier to maintain.
At first, I avoided Sass because it seemed to be aimed at programmers (the documentation was full of programming terminology). But after taking the time to learn Sass, I found it isn’t all that complicated. There are fancy operations and functions that will satisfy the programmers, but there are also loads of cool things that just make writing CSS quicker and more efficient for the rest of us.
The other reason I didn’t want to try Sass was the command line. I can never remember the right thing to type, and I’m terrified I’m going to accidentally type some “command of death” that wipes my computer out. Sass works using the command line, and it needs Ruby installed before it can do anything. But we don’t need to know anything about the command line, installing Ruby, or Ruby itself, to use Sass. Fortunately, there are GUI tools with easy-to-understand visual interfaces that make it easier to write Sass.
In this three-part series, I’m going to give you an introduction to Sass based on the process I followed when building the the Web Talk Dog Walk site using Sass.
Setting Up a Sass Project With Codekit
CodeKit is my preferred GUI tool for writing Sass and I will use it in my examples below. It compiles Sass files and is only available for Mac OSX. CodeKit is free to try, but costs around $30 to buy. If you’re a Windows user, Prepros and Mixture are both similar to CodeKit in function and price, and Koala is a free, cross-platform alternative.
Adding a Project
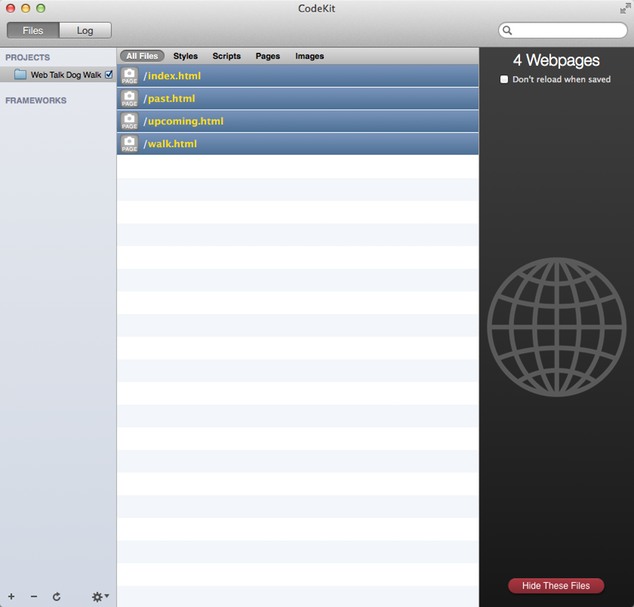
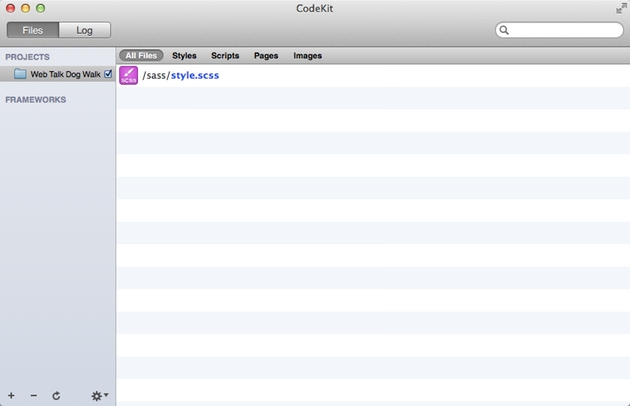
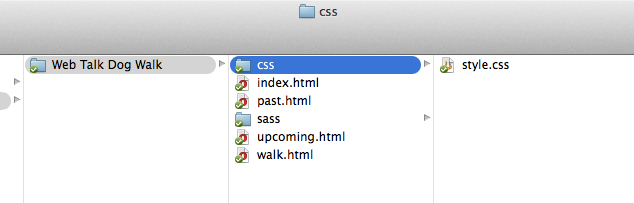
In order for CodeKit to compile the Sass correctly for the project, you need to add the project folder to CodeKit. When you do this, you can see all the files from our project listed in CodeKit.
You don’t need the HTML compiled by CodeKit, so you should hide those files. This makes it easier to see the Sass and CSS files when they’re created.
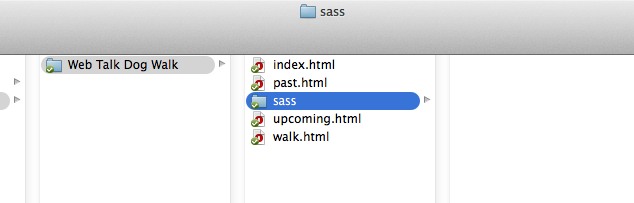
Creating a Sass Folder
Next, create a folder to contain the Sass files. When the Sass files are compiled, CodeKit will create a folder called /css alongside the /sass folder which contains the compiled CSS.
Creating a Sass File
Once your project and folders are setup, you are ready to write Sass. First, create an empty file in the /sass folder and call it style.scss.
You can even change the extension of a .css file to .scss, and it would be valid Sass that CodeKit can compile. This is handy if you want to take advantage of a few Sass features in an existing CSS file.
Writing and Compiling Sass in CodeKit
The first thing I recommend adding to the newly-created style.scss file is the CSS reset:
html, body, div, span, applet, object, iframe,h1, h2, h3, h4, h5, h6, p, blockquote, pre, a, abbr, acronym, address, big, cite, code,del, dfn, em, font, img, ins, kbd, q, s, samp,small, strike, strong, sub, sup, tt, var,b, u, i, center,dl, dt, dd, ol, ul, li,fieldset, form, label, legend,table, caption, tbody, tfoot, thead, tr, th, td, article, aside, canvas, details, figcaption, figure, footer, header, hgroup, menu, nav, section, summary, time, mark, audio, video, svg, hr {margin: 0;padding: 0;border: 0;font-size: 100%; font: inherit; vertical-align: baseline; font-weight: normal;} …The reset is ordinary CSS, but that doesn’t matter because a .scss file can understand both Sass and CSS, and CodeKit compiles them together. When you save style.scss, it will display in CodeKit’s list of files:
Next, you can confirm that CodeKit is compiling as expected. Select the style.scss file from the list to see the path where CodeKit will compile the style.css file. Then, select “Compile” to compile the .scss file to .css:
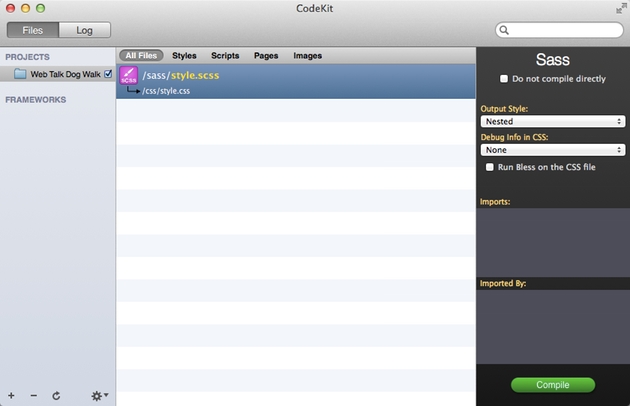
You should now see a new /css folder in the CodeKit project your compiled CSS:
html, body, div, span, applet, object, iframe, h1, h2, h3, h4, h5, h6, p, blockquote, pre, a, abbr, acronym, address, big, cite, code, del, dfn, em, font, img, ins, kbd, q, s, samp, small, strike, strong, sub, sup, tt, var, b, u, i, center, dl, dt, dd, ol, ul, li, fieldset, form, label, legend, table, caption, tbody, tfoot, thead, tr, th, td, article, aside, canvas, details, figcaption, figure, footer, header, hgroup, menu, nav, section, summary, time, mark, audio, video, svg, hr {
  margin: 0;
  padding: 0;
  border: 0;
  font-size: 100%;
  font: inherit;
  vertical-align: baseline;
  font-weight: normal;
}
…
A nice feature of CodeKit is once a file has been compiled the first time, you only need to save your .scss file to automatically compile CSS. This is because CodeKit is now “watching” your file.
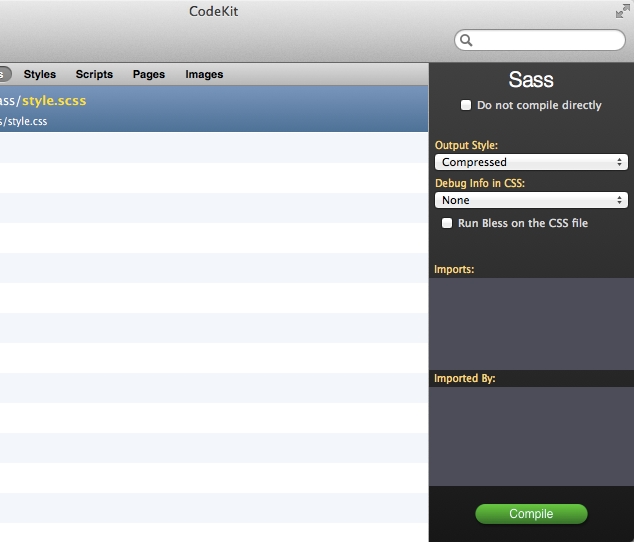
Also, if you would prefer that your compiled CSS is minified, select “Compressed” from the “Output Style” menu:
Lastly, keep in mind that only the final, compiled CSS files need to be uploaded to the server. And these are referenced just like any other CSS file in the head of the HTML:
<link rel="stylesheet" href="css/style.css">Partials
Now that you know the basics for setting up a project and Sass files in CodeKit, let’s focus on some of the specific benefits Sass offers, starting with file organization. Sometimes CSS can become messy and difficult to read, like the CSS reset styles above. It is far easier to maintain when the CSS can be organized in separate files.
Sass partials let you tidy your CSS into different files without having any impact on loading. With standard CSS, you can split your styles into multiple files, and link to each of them from your HTML page, or via @import in another CSS file. However every time you request a file from another location, you’re creating another server request. Many server requests can make a page load very slowly, even if the files themselves are very small.
Partials are separate files containing chunks of CSS and/or Sass. These partials are referenced in a primary Sass file with the @import directive:
@import "partial";
@import "another-partial";
@import "partial-name";
When that primary file is compiled, all the CSS and Sass in the partials are compiled as well. The compiler pulls all of your styles into a single CSS file for the browser to download.
Organizing Partials
Organize your partials in a way that suits your development process. I like to follow a modular structure like SMACSS
- Base HTML selectors (base.scss)
- Layout styles (layout.scss)
- Separate out any dependencies, such as reset styles or web fonts, into their own partials (e.g. reset.scss)
I include these partials in my primary style.scss file using @import syntax
@import "reset.scss";
@import "base.scss";
@import "layout.scss";
In CodeKit, you can see the partials in the same folder as style.scss. However, the partials are greyed out because they’re not compiled directly, they’re included as part of the style.scss file:
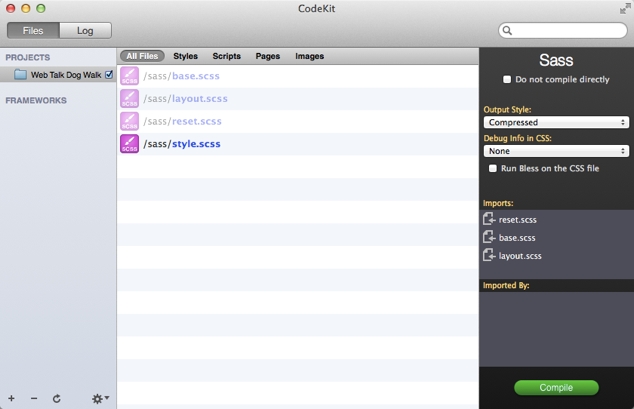
Also, in the /css folder, you can see that CodeKit hasn’t created any new CSS files for the partials because everything was compiled in the single style.css file:
Variables
Variables are the simplest and most instantly useful part of Sass. I use variables for repeating global values such as colors and fonts. A variable is defined with a name prefixed with a $, followed by a value:
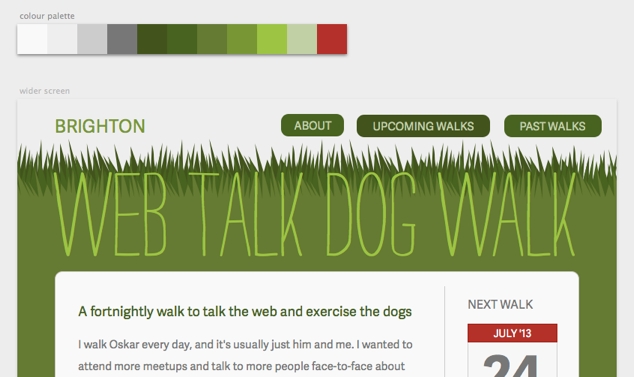
$grey-light: #f9f9f9;In my mockup for Web Talk Dog Walk, I have a palette of all the colors in the design:
To define all of these colors in my Sass, I created a new partial, variables.scss, which contains my color variables:
$white: #fff;

$grey-light: #f9f9f9;
$grey-mid-light: #eee;
$grey-mid: #ccc;
$grey-darker: #474747;

$green-dark: #3F5526;
$green-mid-dark: #44632B;
$green-mid: #637A3D;
$green-mid-light: #759845;
$green-bright: #97C459;
$green-light: #C0D0AA;
These variables could have any name you want, but I try to give them sensible names so they’re easy to remember. I also tend to group them by color and order them by shade, so it’s easy to see which is the next lightest and the next darkest.
The variables can be applied to different elements in the base.scss file. The variable goes where the hex value would usually be:
body {
  background: $grey-mid-light;
  color: $grey-darker;
}

h1,
h1 a {
  color: $green-bright;
}

h2 {
  color: $green-dark;
}

…
When the Sass file is saved and compiled by CodeKit, the CSS output is:
body {
  background: #eee;
  color: #474747;
}

h1,
h1 a {
  color: #97C459;
}

h2 {
  color: #777;
}

…
Variables can be used in this way throughout the stylesheets, and if I suddenly decide that one of my greens isn’t quite dark enough, I can just change the hex value of the variable, and that change will be applied throughout the style sheet.
Comments
Comments are an important part of writing CSS whether you’re leaving notes for your team or just for your future self. They can be used as flags or headings to organize the stylesheet or to explain complicated CSS.
There are two types of comments you can use in Sass. Using the CSS /* comment */ syntax at either end of the comment means the comment will show in the compiled CSS.
With Sass, using the // syntax at the beginning of a line will mark the whole line as a comment, but the // comment will not show in your compiled CSS.
/* This comment will be compiled to the final CSS */
// This comment won't be compiled to the final CSS
For Web Talk Dog Walk, I commented the description of my Sass color variables with the // syntax because the variables won’t show in the compiled CSS, so the comment would be irrelevant:
// Color variables

$white: #fff;

$grey-light: #f9f9f9;
$grey-mid-light: #eee;
$grey-mid: #ccc;
$grey-darker: #474747;
Errors in CodeKit
If there’s an error in your Sass or CSS, the Sass won’t compile. Fortunately, CodeKit has an error feature that takes focus from your Sass file and directs you to the error listed in the project’s Log:
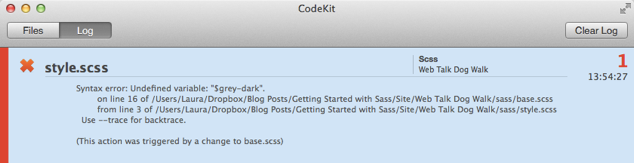
In this example, CodeKit is telling me that I haven’t defined the variable $grey-dark. To fix the error, I simply add $grey-dark to my color variables and save again:
// Color variables

$white: #fff;

$grey-light: #f9f9f9;
$grey-mid-light: #eee;
$grey-mid: #ccc;
$grey-dark: #777;
$grey-darker: #474747;
Coming in Part 2!
In Part 2, I’ll dive further into Sass variables, focusing on using math with variable operations to achieve vertical rhythm. I’ll also introduce Sass’s nesting syntax to make it easier to read and maintain, especially with media queries. Stay tuned!
Going the Extra Mile
Sass has a few useful color operations (also known as color functions) that can help you extend your color variables. For example, if I want a brighter color than I have in my color variables I can use the saturate operation, rather than creating an entirely new variable.
This operation tells Sass to saturate the color of the h2 to 100%:
h2 {
  color: saturate($green-dark, 100%);
}
Which compiles to:
h2 {
  color: #5F8516;
}
Pitfalls to Avoid
- Don’t forget to check the CSS compiled from your Sass, particularly when you’re still learning. It can be easy to create bloated CSS if you don’t understand what is compiled from the Sass you’re writing.
- Remember to use
@importto include your partials in your primary Sass file. Otherwise they could be compiled, but not included in your CSS file.
Things to Do
- Read the Sass reference docs to find out the variety of things that are possible with Sass. Don’t be intimidated, it’s ok to start small.
- Separate your stylesheets into small, modular partial files to make them easy to maintain.
- Use variables to save yourself copying and pasting repetitive colors and units.
- Include the partials that define your variables and mixins at the top of your stylesheet, because other and styles partials need these definitions for reference.
Further Reading
- Sass, Sass
- Sass Reference, Kaelig
- Sass.io, Sass
Which GUI tools do you prefer for your Sass projects?
Discussion
, Mat Doidge said:
said:
Share Your Thoughts
Please Log in or Sign up to share your thoughts.