One of the major problems we face in responsive design is how to create icons that scale to the interface, not just for physical dimensions, but based on screen size and number of pixels per inch. Generally, images are used to add the icon inline using the img tag. Another common technique relies on a grid of the different icons and states — a CSS sprite — saved in a bitmap format, typically GIF or PNG.
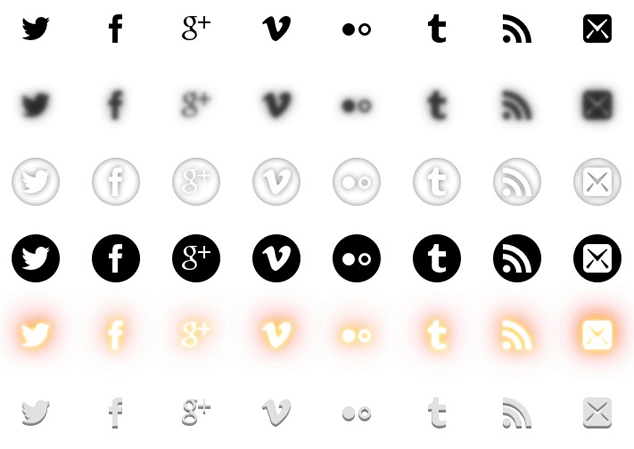
However, the more you scale these images up or down to respond to the context, the more the icon will appear distorted as the bitmap image’s anti-aliasing becomes increasingly apparent. Even worse, sprite-based icons can not be reliably or easily scaled.

I think this why many designers and developers often avoid icons in their design, despite the fact that icons can be amazingly effective at communicating complex ideas in a limited space.
To create responsive designs with scalable icons, I recommend replacing bitmap image icons with vector-based webfonts. These are infinitely scalable with no loss of fidelity. In this article, I’ll show you how to use webfonts to replace image-based icons in your design to improve accessibility, scalability and “style-ability.”
Why Webfonts
Webfonts work like any other file you might use to create the design of your document: simply upload the appropriate font files to your server, and then your web page can download them to make use of them however you see fit. But while we generally think of webfonts as being used to style readable text, they can also be used to display dingbat characters that can be used as icons in our design.
The trick is simple, and fully supported by modern web browsers, including Firefox, Safari, Chrome and Internet Explorer 8+.
The advantages of using webfont icons fall into three distinct categories:
- Accessible: Webfont icons can be used in place of HTML text. The trick is to hide the HTML text from human users, replacing it with the icon using CSS, but allowing it to be displayed for screen readers and search engines.
- Scalable: Because they are rendered using a vector instead of a bitmap image, the icon can be made as small or as large as possible without any loss of fidelity. This allows you to create better responsive designs where the icon size matches the needs of the interface.
- Stylable: Because CSS is used to style the icons, they can be restyled wherever and however you want without having to re-create new images every time. This also means that you can choose from a wide variety of CSS text effects that not only look cool but are dynamic.

How Webfont Icons Work
Webfonts icons work by using CSS to inject a specific glyph into the HTML using the content property. It then uses @font-face to load a dingbat webfont that styles the injected glyph. The upshot is that that injected glyph becomes the desired icon.
To begin, you’ll need a webfont file with the icons you need, either defined for particular ASCII characters (A, B, C, !, @, #, etc.) or in the Private Use Area of the Unicode font, which are spaces in the font that will not be used by specific characters in a Unicode encoded font.
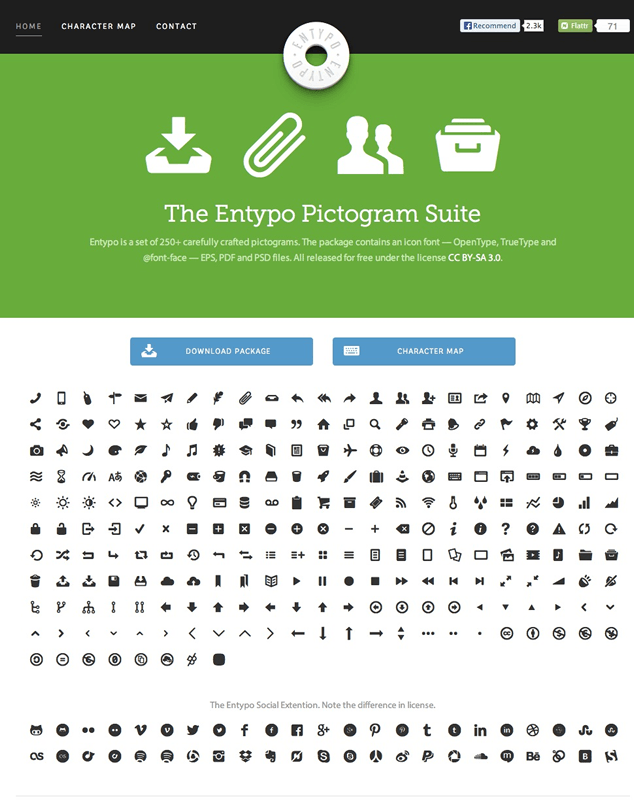
Once you have your font file — Entypo is a great one to start with — you are ready to go.
Step 1: Load the font file
Begin by defining your icon font file’s path using the standard CSS @font-face rule (be sure you have uploaded these files to your server):
@font-face {
  font-family: "icons";
  src: url("fonts/icons.eot");
  src: url("fonts/icons.eot?#iefix") format("embedded-opentype"),
  	url("fonts/icons.woff") format("woff"),
  	url("fonts/icons.ttf") format("truetype"),
  	url("fonts/icons.svg#icons") format("svg");
  font-weight: normal;
  font-style: normal;
}
Make sure to include sources for TrueType, EOT, and WOFF formats. Also include the SVG version of the font. Although it is being rapidly replaced by the WOFF format, SVG is still needed for older iOS devices.
Step 2: Create a CSS rule that turns any tag which contains a class with “icon-” in it into a receptacle for the icon.
This selector allows you to add an icon to any tag you want using a class that contains the string “icon-”.
[class*="icon-"] {
  background-image: none;
  display: inline;
  font-size: 1em;
  font-style: normal !important;
  font-weight: normal !important;
  height: 1em;
  overflow: visible;
  width: 1em;
}
We also need to set the font size, width and height of our icon to 1em so that we can easily scale it using relative sizes. Also remove any possible font weight and styles, which would distort the icon if applied.
Step 3: Create a selector that adds the icon to the receiving tag
Now comes the trick. We use the CSS content property to add a glyph before the tag, and then style that glyph using the icon font we set up in step 1.
[class*="icon-"]::before {
  content: '+';
  display: inline-block;
  font-family: "icons", fantasy !important;
  line-height: 1;
  position: relative;
  top: 2px;
  -webkit-font-smoothing: antialiased;
  font-smoothing: antialiased;
}
This will use the content property to add a default character — a plus sign — as a placeholder before the actual tag using the ::before pseudo-element. Additionally, it’s a good idea to add the WebKit font-smoothing property. I’ve also added a W3C version of that property to be future safe, but that property isn’t approved yet.
Step 4: Create a selector that hides content in the icon tag
Create a class called hide that will hide any text you want to include for SEO and backwards compatibility. Apply this class to any child element within the tag you are using to create the actual icon.
.hide {
  clip: rect(1px, 1px, 1px, 1px);
  height: 0;
  opacity: 0;
  position: absolute;
  visibility: hidden;
  width: 0;
}
Step 5: Create a CSS rule to add the specific glyph for the desired icon
The final CSS selector is the actual icon you want to use, according to the letter that corresponds to the icon in your default set. The letter in this example, “t”, is used for the Twitter icon.
.icon-twitter::before { content: "t"; }In theory, you could also use ::after instead of ::before but if the icon is associated with text, generally you will want the icon before the text.
Alternately, if you are creating your own icon webfont you will want to use the Unicode Private Use area to include glyphs in your font:
.icon-twitter::before { content: "/eo4o"; }This has the same effect as the code above — adding the Twitter glyph — but, if for some reason the CSS does not load, then the icon simply appears as a blank space rather than as a “t”, and the user will see the icon label.
Step 6: Add your HTML
Now it’s time to add the HTML code that will be used to display your icon.
<i class="icon-twitter">
  <span class="hide">Twitter</span>
</i>
I’ve used an i and span tags in this example which have no specific semantic meaning, so are safe to reuse for this generic case.
For example, if we look at the example a typical social footer might look like:
<div id="footerSocial">
  <a href="http://www.twitter.com/"><img src="twitter.png"></a>
</div>
Could be replaced with:
<ul id="footerSocial">
  <a href="http://www.twitter.com/" class="icon-twitter">
    <li class="hide">Twitter</li>
  </a>
</ul>
And then style as desired. The one thing the webfont technique can not do is recreate the multi-color icon style. Instead, these icons will be a flat color.
Styling Webfont Icons
Once created, webfont icons are fully styleable with standard CSS and can be re-styled using CSS pseudo-classes such as :hover, :active, and :focus. There are a lot of ideas that you can bring to bear on styling webfont icons; the sky is really the limit.
One limitation I have noticed, and can not seem to find a solution for, is that you can not apply CSS transitions to any ::before or ::after object on the page.
Make Your Own Icons and Icon Webfonts with IcoMoon
So, the obvious question is “Where do I get the icon webfont from?” Although there are plenty of free and for-purchase icon webfonts out there, the best solution is to create your own custom set using the free online app IcoMoon. You can choose from hundreds of different free icons or pay a small fee for access to a couple of thousand more.
What makes IcoMoon the killer app for webfont icons is that it lets you build your own custom font from icons provided by IcoMoon or by uploading your own SVG files, a format that can be exported from Adobe Illustrator and most other vector editing programs.
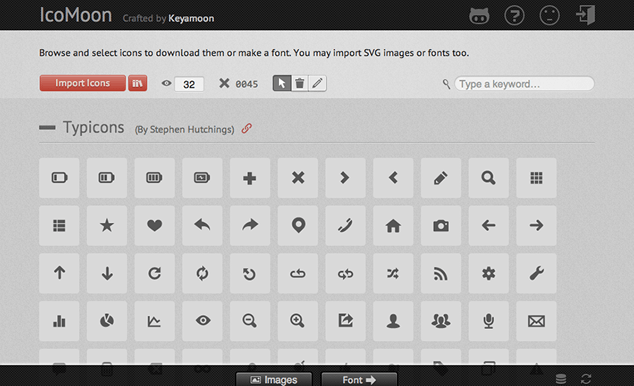
Step 1: Open IcoMoon
To get started, fire up the IcoMoon app. You are presented with a list of several hundred icons to choose from or add more by clicking the library icon and selecting additional fonts to be displayed. You can also reset the size preview size of the icons (the default size is 16px).
Step 2a: Add icons - choose from the list provided
Select the icons you want from the list. It’s as simple as that: click on the icon and it’s added to the list. You’ll notice that as you add icons, they are highlighted with an orange border and white background and the number of icons selected will be displayed at the top of the screen.
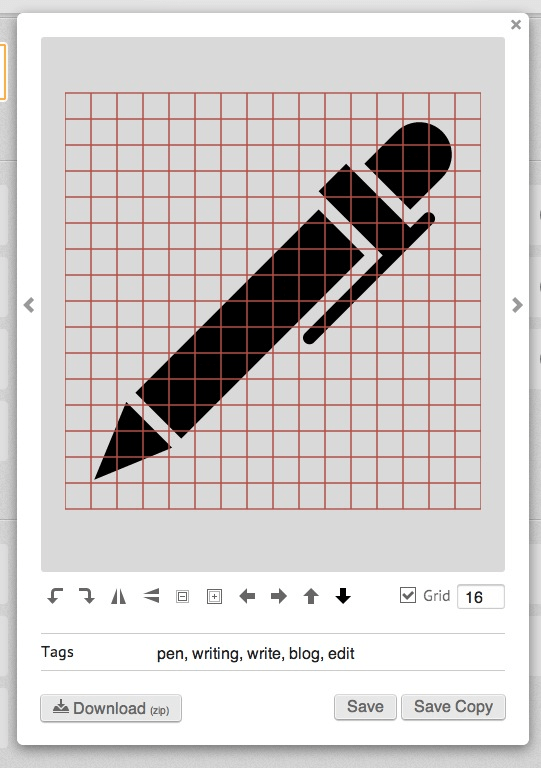
Step 2b: Add icons - edit existing icons
If an icon is close to what you need, but not quite close enough you can edit it in the IcoMoon interface. Just click on the pencil tool located the bar at the top face, and click on the icon you want to edit. A pixel editor will appear allowing you to adjust the rotation and position of the icon.
Step 2c: Add icons - make your own
IcoMoon can import SVG files to create icons. There are a variety of applications that can output SVG files, including OmniGraffle and Adobe Illustrator. To import, click the “Import Icons” button, open your valid SVG file in the dialog, and you will then see your icon in a list of custom icons. Make sure to select it, though, if you intend to add it to your font.
A few helpful hints for creating your SVG icon:
- Strokes are ignored by the app, so all shapes must be created using fills.
- All fills need to be united or combined.
- Only use one color (black is best) since all fills are converted to a single color.
- Don’t use the even/odd fill-rule.
- Output the icon as a single object. In Illustrator, this will mean fitting the artboard to the artwork boundary (Object > Artboards > Fit to Artwork Bounds).
Step 3: Generate font file
In the footer, click the “Font” button. The preferences allow you to name the font file, add a class prefix to the generated code, enable ligatures, create Base64 encoding that could then be used to place the font data directly in a CSS file, or include the font metadata. You can also play around with font metrics but if you are new to this, it’s unlikely you will need to adjust any of these settings.
Each icon can have it’s corresponding letter adjusted. Just click its current character at the top and type the character you want to use. Ideally, build them in alphabetical order starting with “A”. Since you are the person who will be using the font, I recommend spending some time re-tagging the characters using a system that makes sense to you.
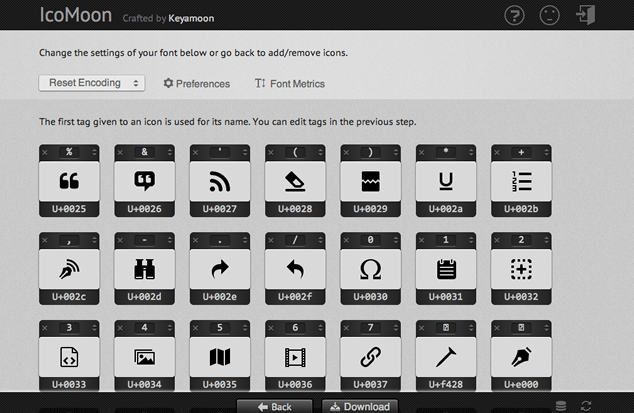
Alternatively, you can choose to use Unicode encoding. In the top left, there is a drop down to reset encoding. Click that and choose the “Private Use Area”. This will re tag all of your glyphs with Unicode data points. The advantage of using this method are mentioned above.
Once you are happy with the tags and preferences, click the “Download” button at the bottom of the screen.
Step 4: Add the font to your site
The bundle of web ready font files download as a .zip which you can then add to your site using the instructions provided previously in this article.
The files provided also include CSS examples that you can copy and place to add all of the specific glyph classes. However, IcoMoon includes a slightly different CSS code to setup the webfont icons, which uses large negative margins to hide the HTML text and data-binding, rather than the font-size method I’m using. I don’t see a clear benefit to the IcoMoon code, but would be glad to hear thoughts on the matter.
Final Word
The idea of using fonts for icons is not a completely new one, but suffered from a lack of fonts to choose from. An excellent tool like IcoMoon, however, makes it a reality. With the growing popularity of webfonts in general, though, this is a technique likely to quickly replace CSS sprites as the accepted method for adding iconography in UI design.
Still, there is something missing right now in web standards that might make webfont icons more useful and effective. The W3C needs to add icon and iconlabel tags to the HTML standard to give the icons a semantic home to live in. In the meantime, we’ll have to make do with the more anonymous i and span tags.
Going the Extra Mile
One drawback to the webfont icon technique is that icons can only be a single color. You can, though, combine two icons together using both the ::before and ::after pseudo-classes and then style them independently.
To see how I’m experimenting with this technique to create CSS-styled form elements, visit CodePen.
Pitfalls to Avoid
- Keep your font file sizes as small as possible. Carefully cut any icons you don’t need when creating your own webfont file.
- Do not to rely on styles for your icons that do not work in older browsers (e.g. text shadows). If you must use these styles, be sure to define fallbacks.
- Test your icons on multiple devices to make sure they work, especially in Windows, where anti-aliasing is often an issue.
Things to Do
- Experiment with your webfont icon styles using CSS. It’s easy to make style changes now.
- Ensure your icons clearly communicate what they are.
- Make sure to style icons for the different dynamic states to always give the viewer visual feedback.
Further Reading
- “Design 101 for Educators: An Icon Is Worth (at Least) a Dozen Words”, Edutopia, 11 September 2013
- “Using Icon Fonts”, Go Make Things, 11 September 2013
- “We’re in an icon-sharpness limbo”, Simurai, 11 September 2013
- “15 Icon (@font-face) Web Fonts to Improve your User Interfaces”, Webification, 11 September 2013
- Symbolset, Symbolset
How have you implemented icons on your web sites? Have your techniques changed to address mobile and responsive needs?